October 10th, 2010
Podcast101 - Creating and Hosting an Audio Podcast
Continue on to Step 2 -->
<-- Go Back to Introduction
Step 1: Creating and Editing an Audio Recording
If you already know how to make and edit an Audio Recording, you can skip ahead to Step 2: Recording an Interview by phone.
The following information on this page is a basic tutorial on using Audacity with screen shots. The purpose of this tutorial is not to make you a power user of Audacity, but rather just to give you the base knowledge so that you can make a simple recording and edit that recording. (If you are someone that likes ScreenCasts - here is a link I came across to a ScreenCast using Audacity)
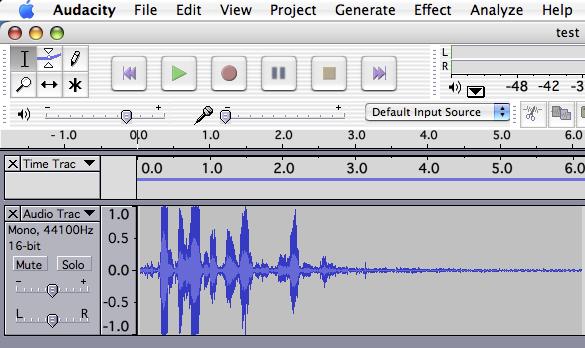
The first screen shot shows the basic tools you will be using in Audacity.
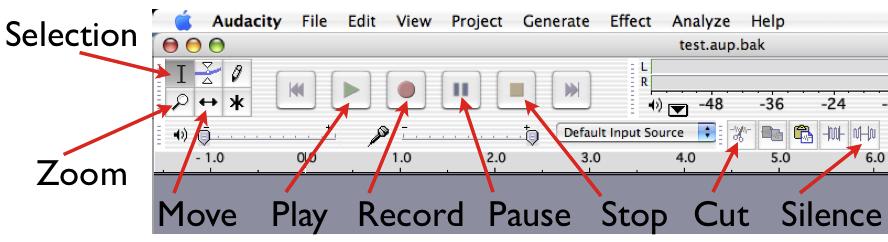
The primary tools you will use to start with are the following.
Selection - Used to select part of the recording track. When editing out Ahhs and Umms you simply select the part of the track you want removed and then hit delete.
Zoom - Used to zoom in and out (shift click) on the waveform. This is very helpful when trying to edit out clicks and pops.
Move - This allows you to move the entire content of a single track back and forth in time. This is used to align up multiple tracks. Say where one track is you intro to a song and the next track is the song.
Play - This plays the audio in the different tracks
Record - This starts the recording. Each time you hit record it creates a new track. So do not hit stop, but rather Pause if you need to pause during a recording. Else when you hit record again it will start up in a new track and you will have to copy and paste if you want to combine into one track.
Pause - Use this when recording a track and you need to stop for a second, but don't want to start back up in a new track.
Stop - This stops the recording or playback.
Cut - This cuts the part of the track you selected with the selection tool. This is used when you want to move audio from one point in time on a track and paste it at another point or on another track.
Silence - This will delete out the selected audio. This is often used where you want to remove the sound of someone breathing in, but don't want to edit down the length of time during the breath. This is a personal choice, some feel you should just delete out the breath and shorten the space between the two words. Others think you should leave the natural pause in there from when the person took the breath, just that the sound of the breath should be removed. Again it is a personal choice and there is no right or wrong choice.
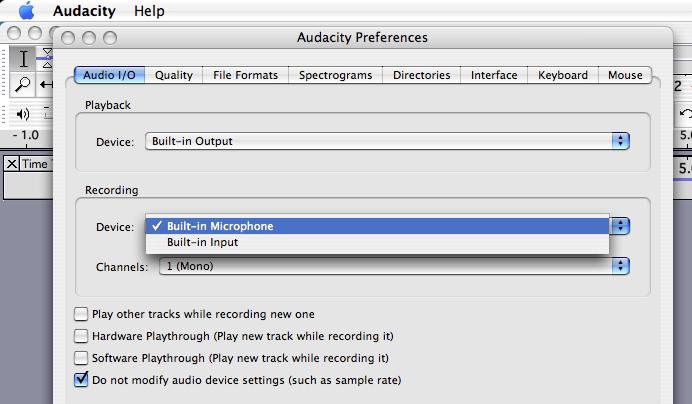
Before you record anything, you need to make sure that in Audacity you have selected the correct Microphone to record from. You will need to go into Preferences in Audacity and then under the Audio I/O tab - select the Recording device bar and select the Microphone you want to use. See Image below.
Once you have selected the correct microphone, you can do your first recording. Simply click the Record button.
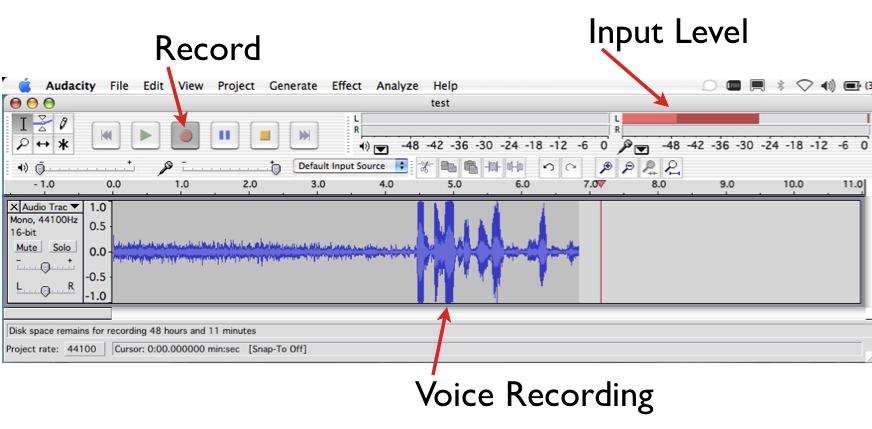
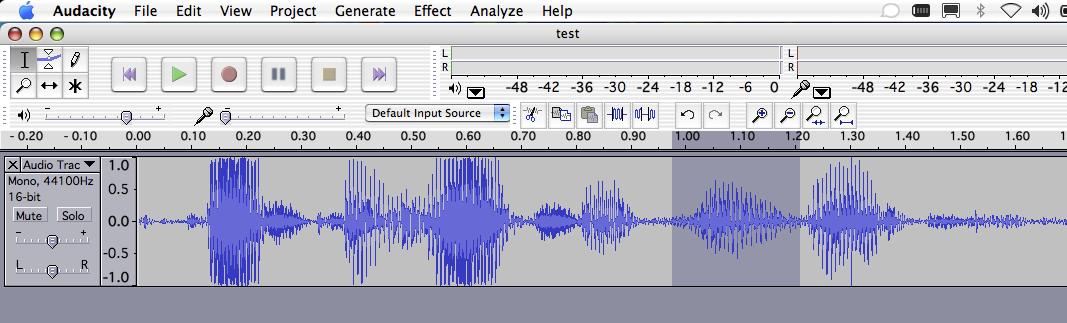
If everything is working correctly you will get a waveform that looks something like that above. If you speak into the mic when recording and you do not see any activity for the input level, you will want to check to make sure your mic is turned on and connected correctly to the computer.
Now after you have recorded a little bit, you may want to go back and review what you recorded and do some editing. In the recording above we may want to take out the dead air at the beginning. To do this use the selection tool and highlight the part you want to remove.
Then just hit the delete key and the part selected will be removed and the recording that remains to the right of the deletion will slide left.
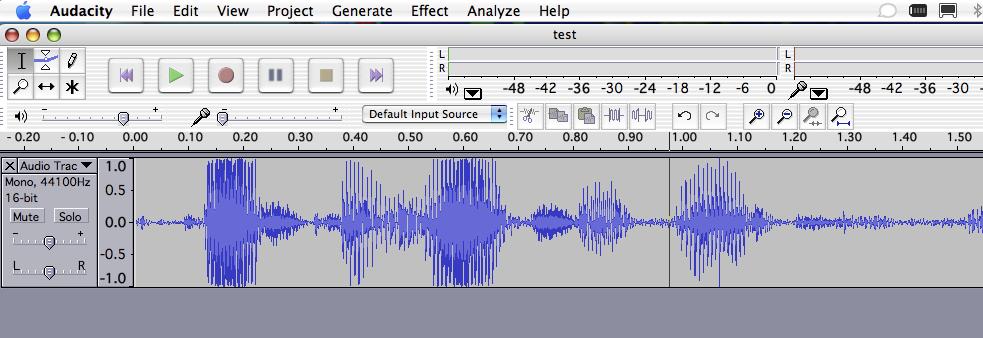
Lets say that after listening to the recording there is an - ahhh - or some other word we want to remove. First use the zoom tool to zoom in a little to make it easier to edit. And then select the word or sound you want to remove
Then hit the delete key and the word or sound will be removed and the remaining audio to the right of the edit point will slide left.
It is advised to save your project (often) when editing, especially if it is a long recording. Audacity is a free program and is known to crash from time to time. Not to mention the issues with certain operating systems that are also known to crash taking down all open applications at the time.
Importing a previously recorded sound clip / audio file:
One thing many people will want to be able to do is to be able to import in an audio file. Whether it be a music clip, a previous recording you did or listener feedback, there are plenty of times where using a pre-existing audio clip is desired and/or needed.
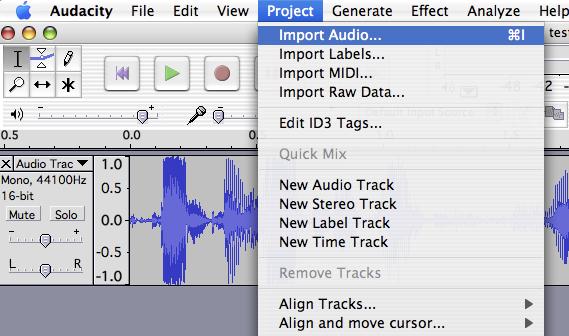
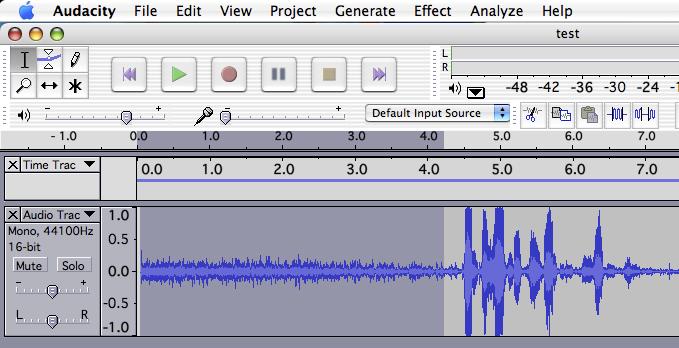
To import an audio file you go to - Project - and then select - Import Audio. The imported audio will be added to its own audio track. See Below.
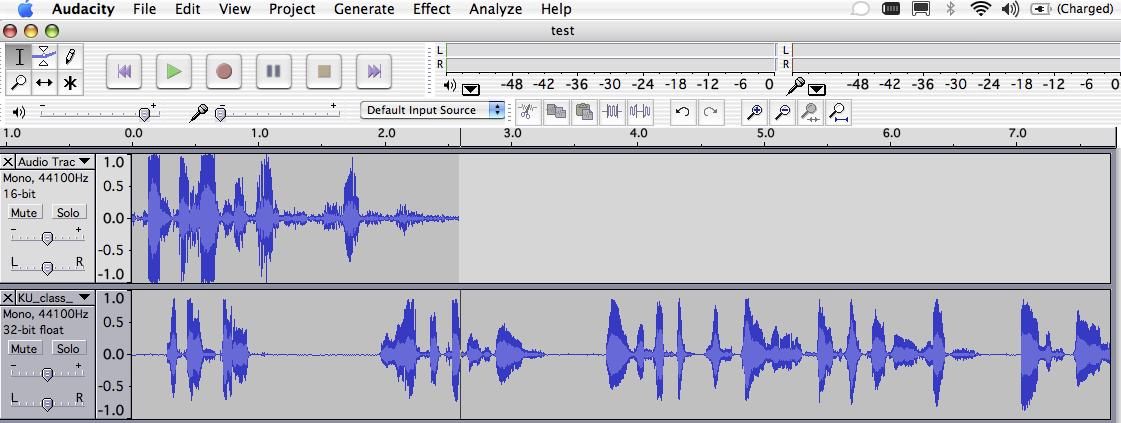
Once the audio has been added in you may want to move the audio to line up with the end of another audio track. What you want to do here is switch from using the Selection tool and click on the Move Tool. Once you do this, select inside the track you want to move, in this case it is the bottom track (imported audio) and then click and drag the audio to the position you desire.
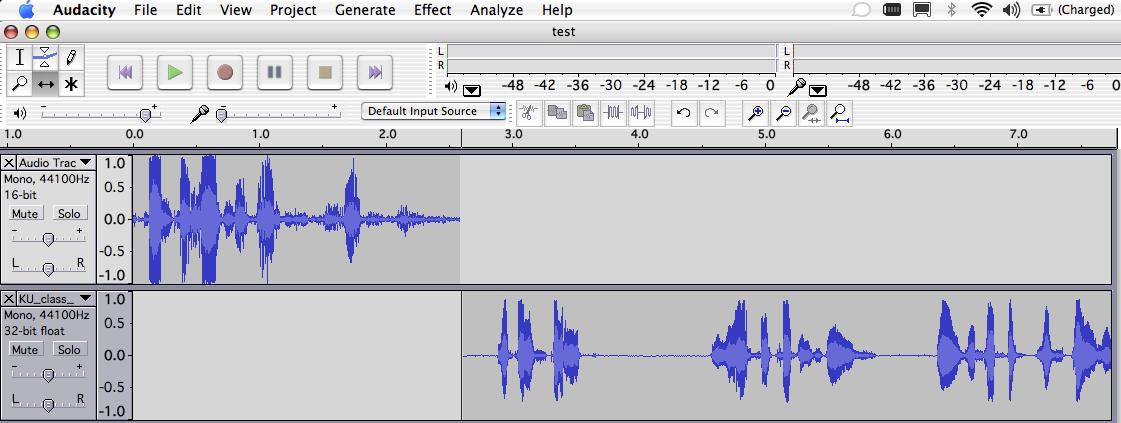
That is all you need to do to line up the audio tracks.
The following screen shot shows some additional tools you will use quite a bit and these are located within the individual tracks.

Mute - This mutes just the track that this option is selected on. So when you playback the audio, the tracks you select mute for will not play back.
Solo - This mutes out all the other tracks and only plays back the track Solo is selected for.
Gain Control - This allows you to increase and decrease the overall audio level for the entire track. You will use this to adjust the audio levels on one track to get it close to the audio levels of the other tracks. This is also used when the initial recording level was done on the low side and you want to bring the audio up on that recording.
We will talk more about Audio Levels in the Step 4: Levelating the Podcast - but it is always best practice to match up your audio levels on all your tracks as close as possible prior to exporting as a Wav file.
Exporting the Recording:
And speaking of exporting the file. At this point if you are happy with your recording, you have done all your editing, you have imported all your audio clips and you have matched up your audio levels, then you are ready to export the recording.
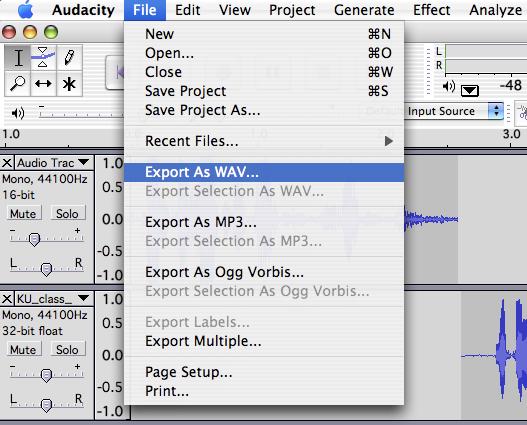
Select "File" and then - Export As Wav. We are exporting as Wav as this is the format we will need the recording to be in so that in Step 4 we can Levelate the recording.
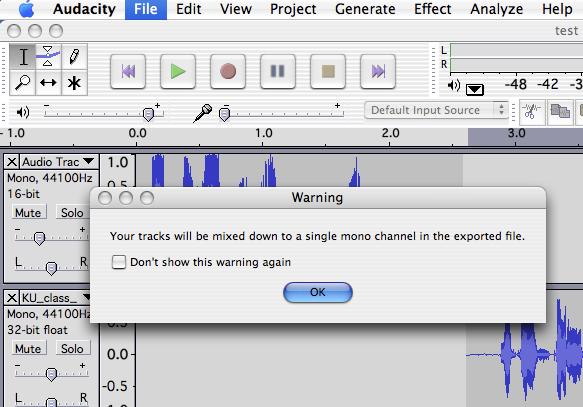
You may see the warning above. If you do Check - Don't show this warning again - and then click - OK.
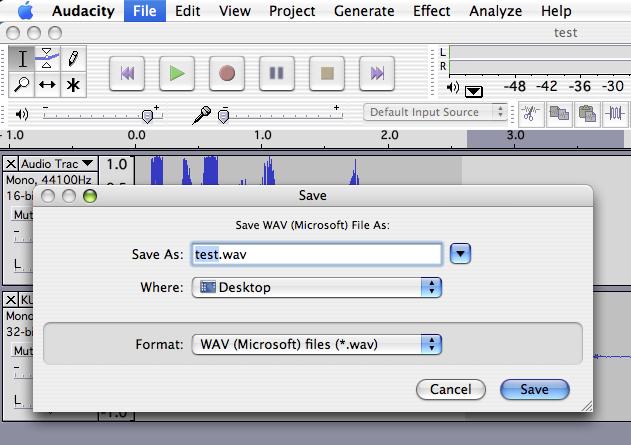
Next save the file to the location of your choosing. Again make sure you are saving as .wav format. You are now ready to levelate the recording per Step 4.
Step 2 deals with Recording phone conversations for free and Step 3 deals with setting up different services to allow listeners to provide audio feedback. If neither of these fit in with what you are doing with your podcast then go and jump ahead to Step 4. That said we strongly suggest at a minimum you make it possible for people to send in audio feedback for you to play on your show. Getting interaction with your audience is one of the most important things you can do to help grow a loyal audience.
Continue on to Step 2 -->
<-- Go Back to Introduction
Top
If you liked this tutorial make sure you put a link to it from your website.
http://www.podcast411.com/podcast101/index.html
If you have comments / questions you would like to add please send an email to the address below and we will post comments / questions on this page.
rob AT podcast411 DOT com
Comments / Questions
.
|