March 24th, 2007
Creating and Hosting an Audio Podcast for Free
Continue on to Step 3 -->
<-- Go Back to Step 1
Step 2: Recording an Interview by phone
Many podcasts are either based around doing interviews (such as podCast411) or they use interviews from time to time to bring in additional content. Other shows may be a round table discussion with multiple guests or co-hosts. In most cases your guest(s) will not be local, so you will be forced to do a remote interview. There are many different ways to do remote interviews. On podCast411 our preferred method is skype to skype, where we use the setup at this link. While skype to skype calls are free, the setup is not, so we will not go over that setup here. I just pointed it out for future reference.
The method we are going to talk about is the simplest one I have found that also offers fairly good sound quality and is of course free. Here is a link to an interview with Michael Arrington of TechCrunch fame that we did using a service called Live Office Free Conferencing. This is the service we will be covering in this step of the tutorial. The only equipment you will need to use this service is your standard telephone (land line or Cell phone but we recommend you and your guest(s) use landline phones as they sound much better than cell phones) and then your computer afterwards to access the file that is stored on their server. With this service you will be able to record the phone conversation and have it saved on their server without the need for you to have any recording device what so ever.
To sign up to this service go to their site at: http://www.liveofficefreeconferencing.com/
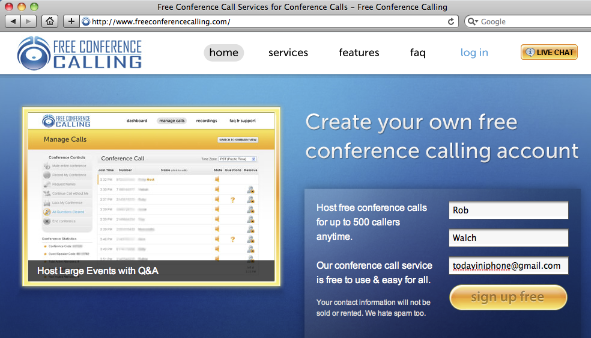
Under Free Sign Up type in:
Your First Name
Your Last Name
Your Email Address
And then click Instant Access
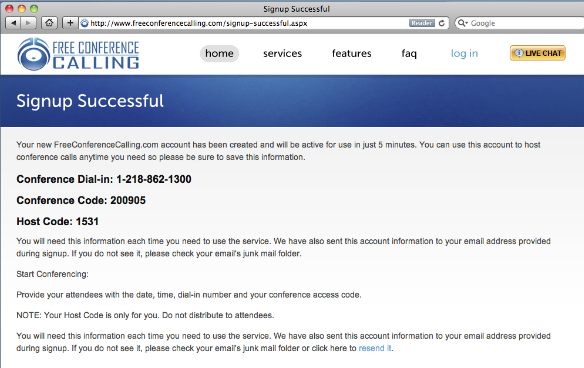
You will then be taken to a screen that confirms you have created a new account and gives you the dial in number for your account, the bridge number and the Moderator Pin. (unlike what I did do not give out the Pin number as that is your password) Next MAKE SURE YOU PRINT OUT THIS PAGE!!!!
There are a few different features listed on this page.
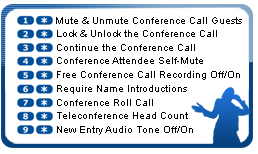
The most important one is 5* This is the feature that starts and stops the recording. This service does not automatically record all calls, you must manually start and stop the recording.
At this point feel free to sign up for a free account. It will then take about 5 to 10 minutes for the account to be available. Once it is available to start a conference call:
1. Dial-In to your Conference Number 1-xxx-xxx-xxxx
2. Enter your Conference Bridge Number: xxxxxx
3. Enter your Moderator PIN: xxxx
4. Once in Hit 5 then * on your keypad. The recording will then start
5. Hit 5 then * to stop the recording.
6. Hang up.
Note: You do not need to have another person on the line to do a recording - as is the case with some other services I have looked at. This means you could use this service to make recordings from the road if you wanted. But that is outside the scope of this step.
To have a guest(s) join in simply give them the dial in number and the Conference Bridge number. DO NOT give them the Moderator Pin Number.
After about an hour or so your recording will be made available on their server. To access the recording you will need to go to their site.
http://www.liveofficefreeconferencing.com/
and log in in the upper right using your Conference Bridge Number and your Moderator Pin number.
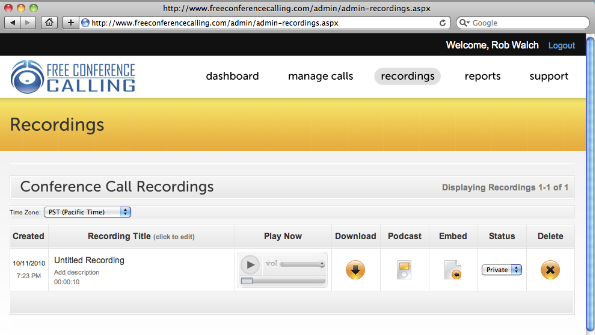
If your recording is available the screen will look something like that above. Again it may take up to an hour after you conclude the call before the recording is made available. The longer the recording the longer the wait before it is available.
To download the recording, Right Click (Control Click) the Icon under Launch
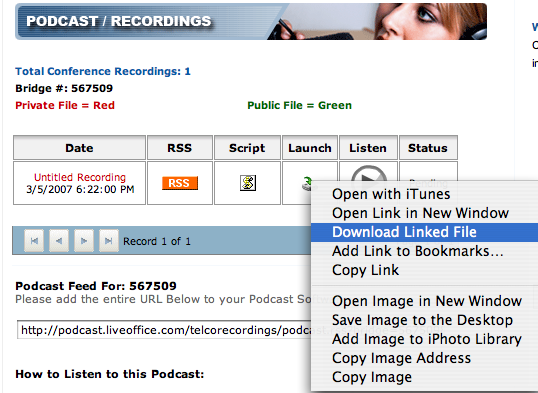
Then choose Download Linked file. The file should then start downloading to your computer.
To edit this file you will want to import the audio file in Audacity as we showed in Step 1.
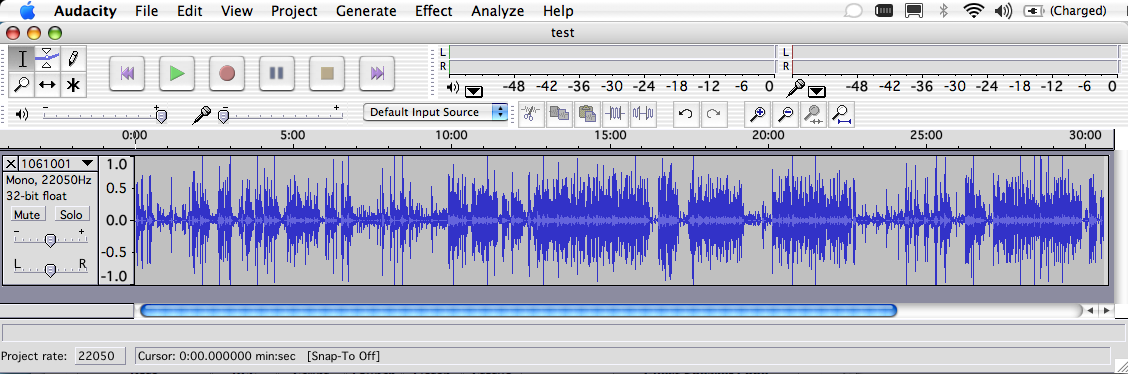
Once the file has been imported it will look something like this above.
You are then ready to edit the file as described in Step 1 previously.
Sometimes this service will record the voice levels of the multiple guests at different levels. By using Levelator as will be shown in Step 4 you can fix any issues with one person being too loud or too soft. This issue is likely to show up as you add in more and more guests or co-hosts.
Continue on to Step 3 -->
<-- Go Back to Step 1
Top
If you liked this tutorial make sure you put a link to it from your website.
http://www.podcast411.com/free/index.html
If you have comments / questions you would like to add please send an email to the address below and we will post comments / questions on this
page.
rob AT podcast411 DOT com
Comments / Questions
.
Full Disclosure: We have
nothing to disclose, there was no payment, favors or any other form of
compensation made for any product or service mentioned anywhere in this
tutorial. All products were picked on their merits and can and will be
replaced if we come across a product or service we feel is better than
that already listed. We reserve all rights to determine what we feel
makes one product better than another.
|